Thursday, December 27, 2018

Star Activities for Preschoolers


Christmas week!  It's been a blur, but I've been trying to soak it all in.
This was the perfect week to talk about stars as we discussed the birth of Jesus and how the wise men traveled to Him by way of a star.
Our Mother Goose Time STEAM station, Sparkly Stars, did not disappoint.


We started our STAR day but discussing light.
I took out a lighter and asked my girl what colors she saw in the flame.
She remarked yellow, orange, and blue.


So we used yellow and blue liquid watercolors to help us make our Sparkly Stars STEAM Station.  We also added a little purple in there for some variety. 
All you need is liquid watercolors, epsom salt, a ziplock bag, and a drying tray to do this activity.  
We did something similar when we made our Rainbow Rice which you can read about here.


My father in law scored this amazing light tray when he worked at Kodak.  It's been a perfect light table for us.  After the salt spent 30 minutes drying, I poured all our crystals into a shallow container and let my preschooler go to town playing with our newest sensory bin. 
 She loved making her handprint in the salt, and drawing in it as well. 


After we finished playing with our STEAM station, we read through the Nursery Rhyme 
"Twinkle Twinkle Little Star" pointing to each word as I read.  I love that MGT sends us these big nursery rhyme posters!  I'm kinda kicking myself for not saving some of the others. Ugh...
I then grabbed a star cutout (from our wand we didn't get a chance to make), wrote "star" on it, and had my preschooler point to all the "star" words.  


Afterwards, we read with brother Follow the Star a cute little book about the birth of Jesus that I scored at Walmart, but it is also available on Amazon.  
We also looked in that book for all our "star" words.
Although we didn't get to more MGT activities, I am so glad we made the Sparkly Star bin.  
It's 2 days after Christmas, and although my girl received some great gifts, she has still made time to play on her light table with her Sparkly Star bin.  A definite win.


What sensory bin fillers are your faves?


Thursday, December 20, 2018

Cookie Day Fun for Preschoolers

I don't know about you, but when I think of Christmas, one of the first things that comes to mind is cookies!  That smell of chocolate chip cookies fresh outta the oven... 
or the shapes of all the sugar cookies... or the rainbow colors of all the sprinkles... 
cookies are definitely a holiday tradition around here.


As we were studying the Indoor Sights and Sounds this week with Mother Goose Time, we had a day completely devoted to COOKIES!
Check out what we did and make your own COOKIE Day at home over the holidays! 

Storytime/Reading:  If You Give A Mouse A Cookie
Math: Working on pattern making and shape recognition creating Cookie Shapes with our manipulatives from Mother Goose Time 
(have your kiddo make "cookies" out of cut up shapes,blocks or any pattern blocks you have at home)


Creative Arts: Creating Cookies with Puffy Paint Icing!
Mix equal parts glue and shaving cream and put into a sandwich bag to make your puffy paint icing.
Create cookie shapes and cut out.  We traced a few cookie cutters we had and also cut out plain circle shapes for cookies.
Add your icing aka puffy paint mixture (it really looks like royal icing) and REAL sprinkles! 
I love that MGT sent us rainbow sprinkles!
Keep decorating your cookies until you have a paper plate full to play and share with others.


You can't have a COOKIE Day without making REAL cookies, so that is just what we did!
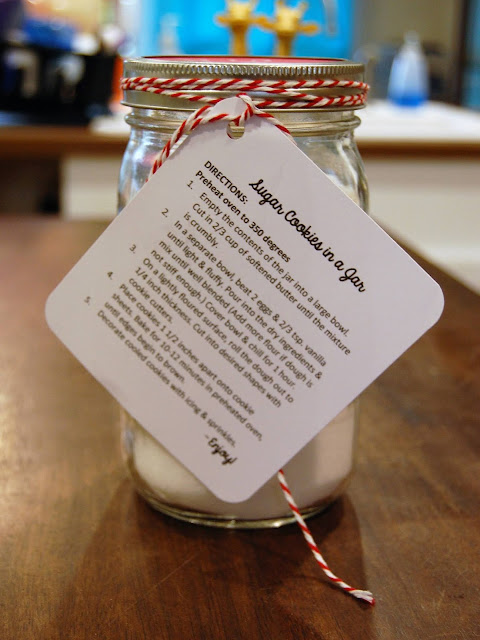
We received a beautiful gift from my pastor and his wife which included Sugar cookies in a jar... so we made them!  I have never made homemade sugar cookies in my life.  I learned a few things.

1. sugar cookies puff out and spread the thicker they are.
2. the dough is not meant to be super sweet- that is what the icing is for
3. it's a messy process... rolling out dough, but cutting the shapes lets my inner Tetris queen come out.
4.  Sometimes toy giraffes like to watch you make sugar cookies... see pic below. #creepers 
5.  Cookies are meant to be shared and these are perfect for sharing once the icing sets.


 What are those shapes you might be asking?
Gingerbread man, candy cane, stocking (upside down) and a snowman (he really puffed out).
There was also a bell shape that turned out to be more circular than bell shaped after the cooking process. But my girl didn't care, and she did a fabulous job cutting the butter into the dough and mixing up the wet ingredients. Her cookies turned out really tasty too and look at that sprinkle coverage on that gingerbread man!  Never can have too many sprinkles.

Those are going to the mailman. He's been working some serious hours these last few weeks.
We hope you too will have a cookie day at home and share it on our Facebook page!

So what cookies are you baking this holiday season and who are you sharing them with?


Friday, December 14, 2018

Lessons from Ice Day

Busy.  Life is just so busy...both in the everyday normal (laundry, cleaning, feeding, cooking, errands...all the stuff), and even in schooling (especially public school- I speak from experience).

To slow down means I have to make a conscience effort to stop, listen, and observe the world around me...especially watching my kids learn.
  There are treasures all around us... many that I neglect to see due to busyness.

This week we looked into the Sights and Sounds of the outdoors with Mother Goose Time. Even though it might seem that there isn't much happening during the winter outdoors, there is so much beauty if we just slow down to see it and take it in.  I learned this lesson the hard way on ICE day.


Not gonna lie.  Ice day was HARD- because teaching with a curious hands on 1 year old who hates to take long naps and be contained in any way possible makes teaching my 4 year old girl difficult.  Therefore our ICE day was split into 2 days.  
Sanity is more important than a lesson plan. Always.


Using an eyedropper and white glittery paint, Avaleigh squirted and dripped paint to resemble icicles while Everett schemed ways to get his hands on her work.
In the end, it turned out beautiful.  But seriously yall, in the moment pictured above I was about to lose it (I had already listened to him scream/whine for at least an hour)
However, as I look at this picture I captured, I see the look of wonder in his eyes and although the moment was difficult, there's sweetness in it too.  I wish I had slowed down then to see it instead of getting so frustrated.  Maybe I'll remember that next time...


On Ice Day round 2, we completed a really neat science experiment!
Down here in Texas, we hardly get snow, but we do have ice occasionally.
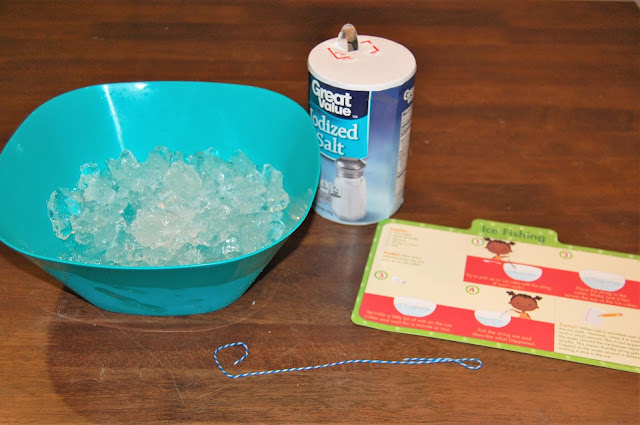
This experiment teaches how salt helps melt ice,


Although Avaleigh's string did not have ice cubes actually come off with the string like the illustration depicts on the card, she could feel that the string had become frozen to the ice due to the salt melting the ice.  I had her draw in her journal the experiment and label it.  Then she told me what happened and I wrote it down.
Oh and that picture on the right is a whale with hurt fins, and some kind of animal (octopus I think) helping carry it.  What can I say? Her favorite show is Octonauts. ha!

We finished our Ice Day by making Egg shakers, which was a STEAM station mentioned in last week's MGT materials.  I made egg shakers a few years ago, which you can read about here, the only altercation I did was actually hot glue the eggs together.
They are my son's new favorite toy.  And for $0.88 who can beat that?
Here's a little 1:20 video of them enjoying the shakers together.


How can you tie the winter outdoors to egg shakers?
Use items from the outdoors to fill them, or try to mimic sounds we hear outdoors with a certain egg shaker sound.  Lately, it has been raining constantly here, and an egg shaker filled with sugar matches the sound of the rain outside my window.  

I know we are all busy- especially at Christmas time.  If there is anything ICE day taught me, it's that I have to slow down, breathe, and savor the sweet moments I get with my kids even if these moments are disguised in chaos.  I have to choose to see it- I have to look actively look for these moments otherwise I can miss the beauty.  Just like we all can miss the beauty of the Sights and Sounds of the Winter Outdoors.


Happy learning!


Follow our adventures on Facebook, Pinterest, and Youtube.


Thursday, December 6, 2018

Make and Play: Pellet Drum

It's a new month, which means a new unit in our Homeschool Preschool from Mother Goose Time.
This month we are studying Sights and Sounds with the first week focusing on the Orchestra.
"By exploring musical instruments, children hear sounds, tones and learn to communicate without words."-MGT

Today we studied DRUMS, and it is the percussion instrument my one year old son knows full well and can play right alongside his older sister. Ha! 


Our lesson started with me asking my 4 year old, "What could we use to make drums?" 
 Avaleigh proceeded to beat on the wall, globe, chair, table, and even her legs.  
Anything can be made into a drum, and I explained that today we would make a Pellet Drum.
The supplies needed are: thick paper plate(s), straw, beads, yarn, crayons or markers, and a stapler.


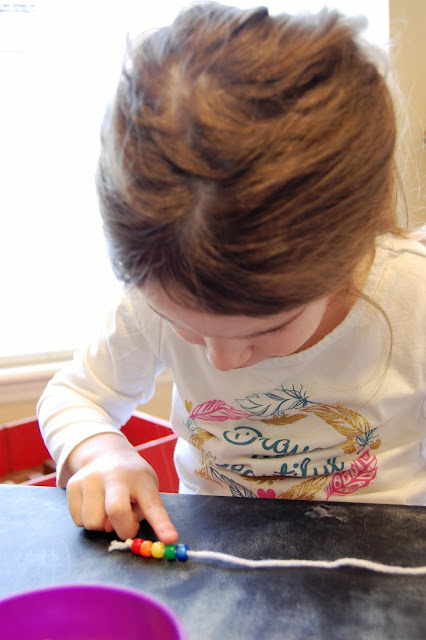
The first thing my girl did was decide on tha pattern of the beads she wanted to place on her 2 pieces of yarn.  Because she is into all things rainbow, naturally that is the pattern she chose.
I only tied off the 2 ends so the beads would stay towards the end of the piece of yarn.  
She completed 2 of these and it was fantastic fine motor skills practice.


After lacing her beads, she colored her plate with a rainbow circular pattern like that depicted on the "Make and Play" card.  I then used a stapler to attach all the parts.  I only lined up the spots for Avaleigh and she then pressed hard on the stapler to connect everything.


In hindsight, I should have had her use 2 plates (one for the front and one for the back) but it still worked out well and she had fun.  By only using one plate, her straw seemed a little more bendy and too flexible.  Having 2 plates would have provided the stability needed to keep the drum beating easier.  She played with her drum quite a bit by twisting the straw in her hands causing the beads to hit her plate and create beats.  She really enjoyed this activity.
As she played, I struggled to capture non blurry pictures!  This was the best I was able to take.


My little percussionist.

The rest of this week we will be discussing woodwinds, horns, stringed instruments, and the piano!
So go make your pellet drum with your little one and come back and see us next week as we study the Sights and Sounds of the Outdoors.  Until then,

Happy Music Making!


Be sure to like us on Facebook, Pinterest, and Youtube!


Friday, November 30, 2018

Preschool Rhyme Time

Lately my little girl has been into sounding out words by syllables.
"Momma, can you say 'ev-er-ett is scr-eam-ing'?" 
Yes dear, I can.  And I can hear him.  Ugh.
By sounding out words into syllables, she can catch rhyming words 
more often since she can hear the ending sound to the words. 

On our Bridge Day, my girl built bridges between picture cards that rhymed.
This activity could be done with any pictures or objects you have that rhyme.  Just try to only have one match to each rhyme.

Mother Goose Time supplied us with a river picture, popsicle sticks, and 6 picture cards:
boat, coat, truck, duck, star, and car.  
Draw a river on a piece of paper or with chalk outside.
Place one set of card on the left side of the river, then flip over their matches on the right side of the river.  Kids flip over cards trying to find the matching rhymes.  When they find a set, they can use popsicle sticks or whatever item you have for bridge making, to build a bridge between those 2 cards.


Here's a video of me explaining how to rhyme with my girl as we played this game.
By the way, she loved this game!  We have played it several different times throughout the month.


Hope it helps you as you and your kiddos explore rhyming!


Wednesday, November 28, 2018

Airplane Launcher Craft

We've been studying all things transportation this month in our 
Mother Goose Time preschool curriculum, and today was AIRPLANES!
I have to admit, when I first saw this Airplane Launcher Make and Play craft, I really wanted to skip it.  It just looked like a little more work for me than my preschooler, but we went ahead and dived in and I am SOOOO glad we did! 
Check out our video...


Here's what you need:
 paper, scissors, tape, straw, and stickers (optional)

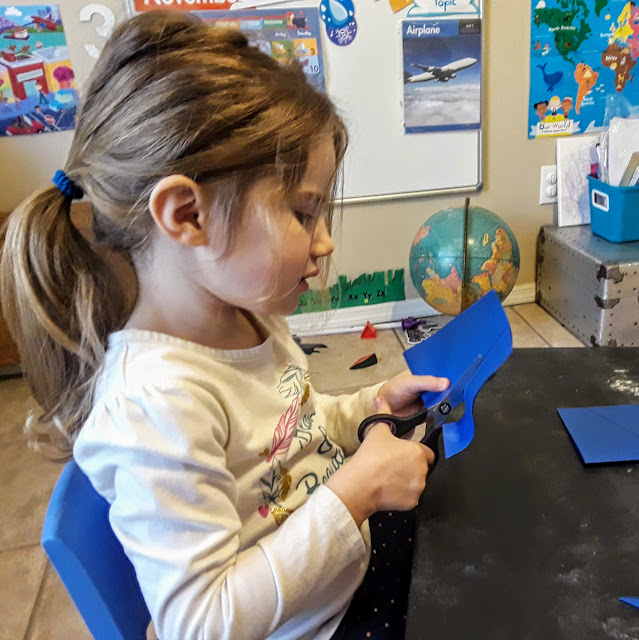
We made 2 airplanes so double the materials.  I did fold one sheet of paper in half and drew 2 parallel lines for my daughter to cut.  These became the wings for our planes. 
This activity was great for fine motor skills (cutting, peeling and placing stickers) and gross motor skills as she chased her airplane later.  


After making the wings with one sheet of paper, we rolled the second sheet into a tube and taped it down.  Then you fold one end on the tube and tape it down.  Now there is an opening for your straw to go through to help you launch your plane!   But first you have to pretend to make them fly like my girl did below ;) 


Now the super fun!  MGT sent us a numbered runway, but you could put any type of marker placement on the floor- numbered tape, little cards with numbers, or even use a numbers from a deck of cards!  Ask your kiddo to make a prediction about where their plane will land, and then place your straw into the tube.  You now have an airplane launcher ready to be blown!

5...4...3...2...1...launch!
(blow into your straw)


Was your prediction right?  Did it go further or not as far as you thought?  What could you do to make it land on the number you guessed?  Let's do it again!  Let's predict where it'll go this time.

My girl played and played and played some more with this.
She is so excited about it and already mentioned telling Daddy as soon as he gets home.

I'm glad I didn't skip this one.  I hope you don't skip it either!


Tuesday, November 27, 2018

Alphabet Delivery Truck

November has been a rough month on the homeschool front.
I am the Children's Director for our church and this month has been insanely busy as we have opened our new Children's area after a fire back in August. 
Not to mention the Thanksgiving holidays, my husband's 40th birthday, and planning my son's first birthday for December 1st.  Whew.... crazy....

So when my friend needed a little help with getting things done, I watched her son, but we needed to have some homeschool time too.  We just added him right on it and it was so much fun!


My girl and Joseph first made delivery trucks from our Mother Goose Time Make and Play materials.   I had to start the folding process, but they were able to fold it after I showed them where.  I helped with the tape too, but once their truck was complete, they had a blast making it deliver all sorts of things, including cookies from the play kitchen.


Later after Joseph left (and I finally got Avaleigh out of her pajamas),  we played another delivery game with her toy truck she made from the Make and Play segment.
MGT supplied us with a bunch of picture cards that started with D,U, or J.  
My girl would say the word emphasizing on the beginning sound and place it in her truck.  She would then deliver the picture to the correct letter house and place it in it's pocket.  


My girl loved this game!  She really wanted to play it again after she had finished placing all the cards in their houses, but baby brother entered the scene and knocked down the houses.  
Babies.... ugh.... can't control them nor reason with them. ;)